
Homemade Bread: From Sourdough to Artisan Loaves
- Date: 07-Aug-2023
- Author: Glamoroxe
- Food
Unleash the warmth and aroma of freshly baked bread right in your own kitchen. Welcome to "Homemade Bread: From Sourdough to Artisan Loaves". This post is not merely about recipes, but it's an invitation into a world steeped with tradition, texture, and taste - it's all about becoming a home baker par excellence! For those passionate food lovers who find comfort in the rustic crunch of sourdough or marvel at the fluffy interior of meticulously made artisan loaves - we're here to unwrap these mysteries for you. Whether you are just beginning your yeasty explorations or are looking to sharpen your kneading skills further, this guide will satiate both curiosity and cravings. So tie on that apron and prepare yourself as we journey from simple ingredients sitting innocently on our pantry shelves onto something truly magical happening inside our ovens - let's bake some memories together!
Understanding the Basics of Sourdough Bread
Sourdough bread is a unique and timeless recipe that has been around for centuries. It is known for its distinct tangy taste and chewy texture, making it a favourite among bread enthusiasts. The key ingredient in sourdough bread is the "starter," a mixture of flour and water that ferments over time. This starter contains natural yeasts and bacteria that give the bread its signature flavour. To make sourdough bread, the starter is combined with more flour, water, and salt to form a dough. The dough then undergoes a long fermentation process, allowing the natural yeasts to break down the complex carbohydrates in the flour and create carbon dioxide, resulting in the airy texture of the final loaf. Sourdough bread requires patience and skill, but the end result is a delicious, homemade loaf that is worth the effort.
Creating Your Own Sourdough Starter: A Step By Step Guide
Making your own sourdough bread from scratch begins with creating a sourdough starter, a living culture of wild yeast that adds a tangy flavour and chewy texture to your bread. To begin, mix equal parts flour and water in a clean glass jar. Cover it loosely with a cloth and let it sit at room temperature for 24 hours. After this initial period, discard half of the mixture and feed the remaining starter with fresh flour and water. Repeat this process daily for a week, discarding and feeding, until the starter becomes bubbly and fragrant. Once your sourdough starter is active, it is ready to be used in your favourite bread recipes. Maintain it by feeding regularly and storing it in the refrigerator between uses.
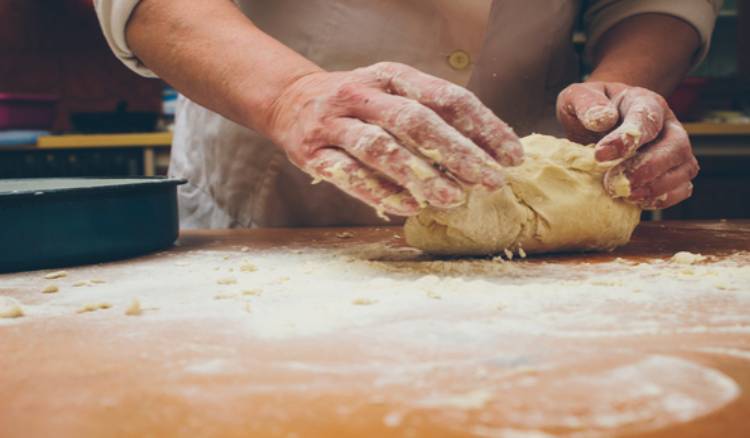
The Art and Science Behind Kneading Dough
The art and science of kneading dough play a crucial role in the process of making homemade bread. Kneading dough is not just about combining ingredients; it is about developing gluten, which gives bread its structure and texture. As the dough is worked and stretched, the gluten strands align and form a network that traps the gas produced by the yeast, resulting in a light and airy loaf. Kneading also helps distribute the yeast evenly throughout the dough, ensuring proper fermentation and flavour development. Additionally, it helps break down starches into simple sugars that the yeast can feed on. As a result of all these factors, skilled bakers can create bread with a perfect balance between tenderness, chewiness, and a satisfying crust. The process of kneading dough requires patience, technique, and a deep understanding of the science behind bread-making.
Crafting an Artisan Loaf: Techniques, Tips, and Tricks
Creating a perfectly baked artisan loaf requires precision and expertise. To start, the key is in choosing high-quality ingredients. Opt for organic, stone-ground flour and natural yeast for the best flavour and texture. The dough should be mixed until it reaches the ideal consistency - not too sticky or dry. Then, use the folding technique to develop gluten structure and create an airy crumb. This involves gently stretching and folding the dough to trap air bubbles inside. Additionally, using a Dutch oven or baking stone while baking can help achieve a crispy crust and even heat distribution. Lastly, proper resting and proofing times are crucial for optimal flavour and texture development. By following these techniques, tips, and tricks, you can master the art of crafting a delectable artisan loaf that will impress both your family and friends.
Common Pitfalls in Homemade Bread Making and Their Solutions
While homemade bread can be a rewarding culinary endeavour, it is not uncommon to encounter certain challenges along the way. One common pitfall is ending up with a dense and heavy loaf. This may happen due to over-mixing the dough, using too much flour, or insufficient proofing time. To overcome this issue, it is crucial to follow the recipe carefully, mix the dough just until it comes together, and allow enough time for the bread to rise properly. Another frequent problem is having bread that does not rise enough during baking. This can occur if the yeast is inactive or expired, or if the dough is placed in a cold environment. The solution is to use fresh yeast and ensure that the dough is placed in a warm place for optimal rise. By being aware of these common pitfalls and following the appropriate solutions, homemade bread enthusiasts can achieve the perfect loaf every time.